

Tour des Dents du Midi
The Ultimate Guide.
The Key Facts
Walk length |52km (32 miles)
Elevation gain |3200m (10,440m) / 3800m (12,500ft) with haute cime climb
Difficulty |Moderate
Start / End |Champéry
Recommended time to hike |June to September
Busyness on trail |Lightly busy

Check out my adventure!


The Route
An Overview
The Tour des Dents du Midi encompasses everything a multi-day hike in the Swiss alps should be. Beautiful picturesque scenery, well maintained footpaths and a sense of magic in the fresh alpine air. The Tour circles the mighty mountain range of the Dents du Midi. An optional variant up to the Haute Cime will take you at 3100m+ elevation, allowing you to see to Mont Blanc and beyond. Each stage of the tour presents a completely new breathtaking scenery, from high alpine passes to rich green forests and more.
I completed the tour in July 2024 over three days. It really is the perfect ‘long weekend hike’. I both camped and stayed at refuges along the way. Whilst the Swiss prices are steep, you will take home with you memories of a lifetime.
How difficult is the hike?
The Tour des Dents du Midi is a moderately challenging hike.
Trail condition - very well maintained and easy to follow.
Steepness - Steep hiking from Champéry to Lac de Salanfe. Several smalll sections require scrambling (with the assistance of a chain provided on the rocks). Beyond Lac de Salanfe, the trail is less steep and less technical.
Trail length - multiple refuges along the path depending on your hiking speed.
Weather - see weather section below. During summer months, weather will not impair the hike. Outside of June - September, expect more snow and colder conditions. Always check the weather before hiking.
Obstacles and wildlife - Cows and bulls are present and may block your path by Lac de Salanfe, however they are not threatening.
The tour is more than easily achievable by self-guiding due to the trail maintanence, quality of direction marking and ease of hike. A perfect hike for all levels.

Highlights of the Walk
These are my top three memories and locations from my journey along the Tour des Dents du Midi:
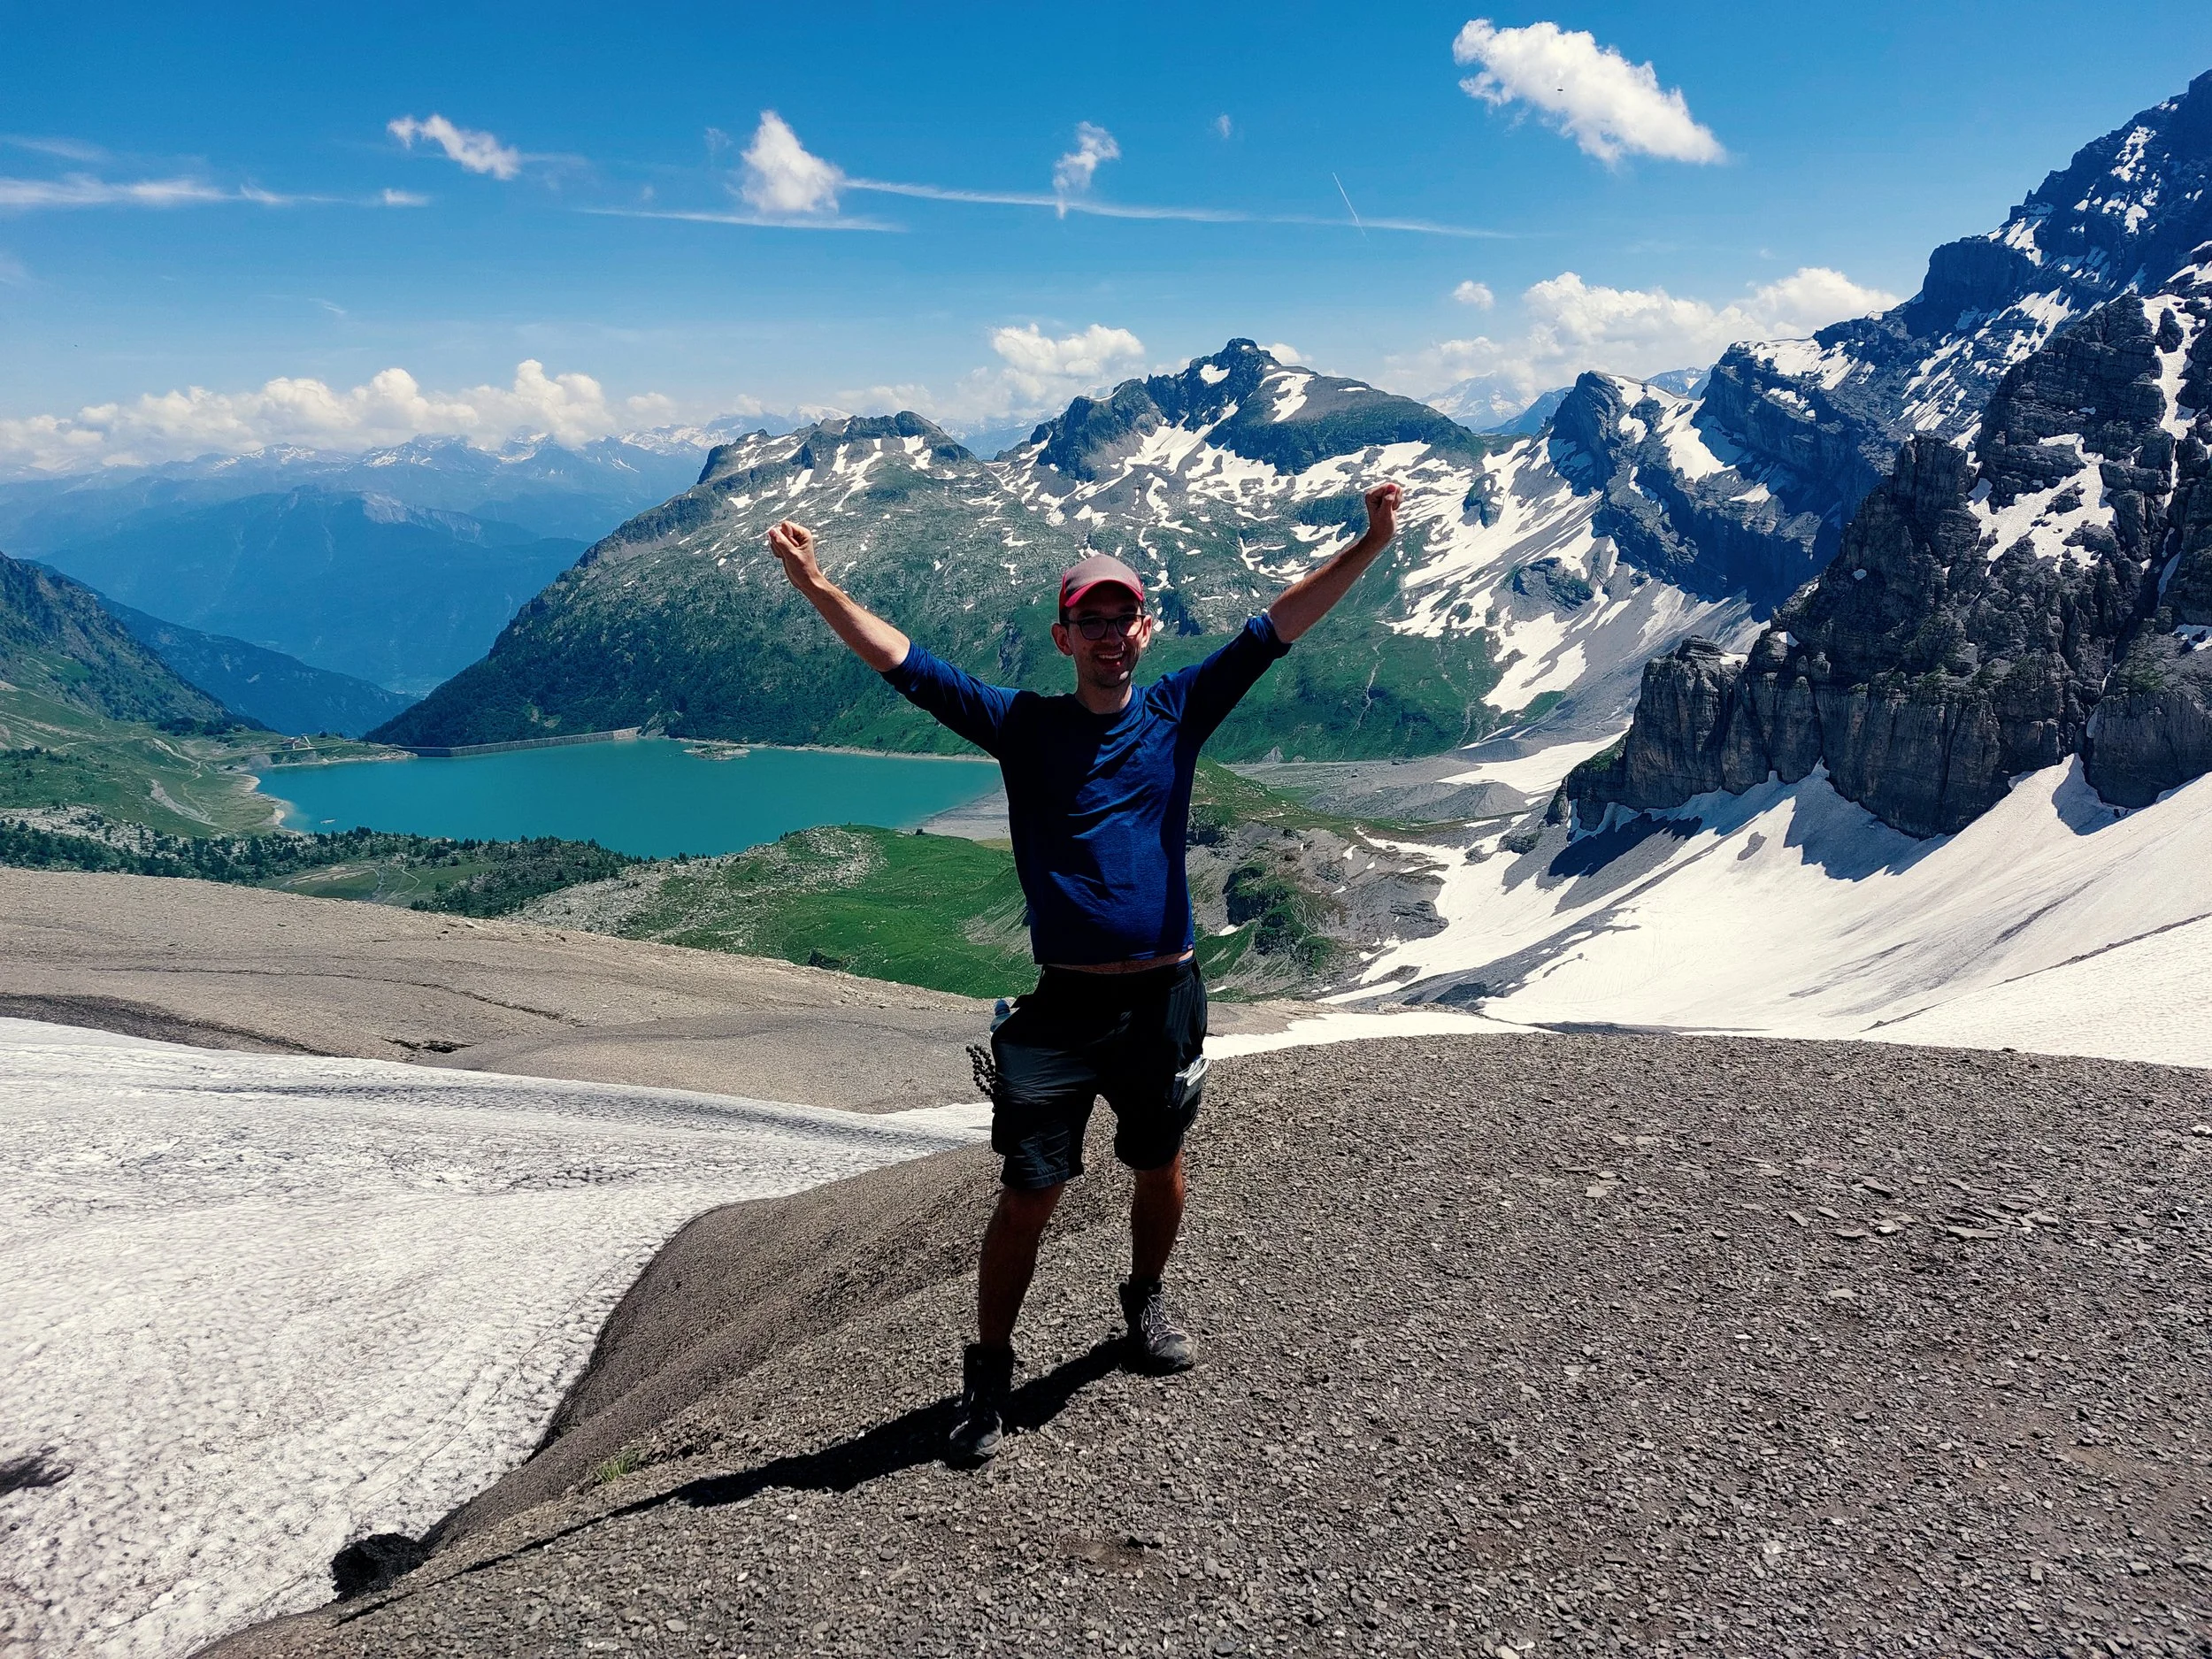
The view from Haute Cime
With approximately 2000m elevation from Champéry, the summit isn’t easy but wow was it worth it! From the heights of the clouds, I could see into the majestic Mont Blanc and beyond. There was a real feeling of accomplishment as I knew the hardest leg of the journey was complete.
Sunsrise at Lac de Salanfe
I camped by the Lac after day one of hiking and was treated to a sublime sunrise overlooking the 3,200m Tour Sallière mountain behind the lake. It was the perfect swiss picutre: mountains, lake, cattle, a dam and beautiful weather. The mountains were laced in snow from the winter past showing a rich colour pallette across the mountain range. To compliment the view, the mountain reflected perfectly of the lake, adding to the sense of awe and inspiration.
Reaching Signal de Soi on day three
The signal de Soi stands at 2054m elevation and overlooks the finishing point of Champéry in one direction, and in the other, the imposing mountains of the Dents du Midi. Although reaching this summit adds 20minutes to your journey, it was thoroughly worth it being exposed to such beautiful 360 degree panoramas.


When to go?
There are a couple of things to keep in mind when deciding when to embark on the trail:
-
June to mid September.
This is the safest time to go. Often, outside of this time, snowfall may cover the trail, requiring the use of crampons. I went in early July and had one or two patches of snow to traverse. It’s slow going and not too pleasant, unless you’re an experienced hiker, I would stay witin these dates.
The mountain conditions can always bring surprises, it is not unknown to see snowfall throughout the summer too, so check daily the weather forecast to plan your next day. See my section called ‘Weather’ for more.
-
The summer holidays in Switzerland vary between regions but are typically between the end of June and middle of August.
Expect the trail to be busiest then. There will be a higher demand for refuges. The Auberge de Salanfe was very busy when I visited in July, but the Auberge de Chindonne had plenty of space, I booked my stay on the day with no problem!
During my hike in July, I found the trail to be somewhat busy but not at all overwhelming. I found it pleasant to be passed every so often by fellow hikers.
Be sure to leave early (before 8:30am) if you want to avoid larger groups of hikers.
-
Trail running competitions at the end of September.
Champery is world renound for its mountain biking. In 2024, the European downhill mountain biking championships were held.
Cattle descent from alpine pastures
Tpyically in late September to early October depending on weather conditions, the cattle descent is a tradition marking the descent of cattle from their alpine pastures with a festive atmosphere.
Suggested itineraries
Below is a list of suggested itineraries from two to five days. You can also find a short description each section of the route, the trail difficulty and notable features.

Two day schedule

Three day schedule

Four day schedule

Five day schedule
The Stages of the Trail
Stage One: Champéry to Cabanne de Susanfe
Distance: 7km (4miles)
Elevation gain / loss: 1000m / 200m
Stage one is all about ascent in order to leave Champéry and enter the Dents du Midi. The trails are very clearly marked and in good condition, however some scrambling is required here. In sections, metal chains have been provided to help with this. Some scrambling experience is preferred but the climb is more than doable. To split up the ascent, the Refuge de Bonavau sits nicely in the middle where you can grab a drink or snack.
Following the main ascent you will reach a lake and damn where you will turn due East and head for Cabanne de Susanfe. The ascent is slightly less steep from here but is uphill all the way to the Cabanne. You will be treated with stunnign 360 degree panoramic views however all the way up.
At the Cabanne, you can buy food and snacks with cash.

First climb of the trail overlooking Champéry

Approach to Refuge de Bonavau

Typical trail condition

View to Champéry after some scrambling

Some scrambling required

Some scrambling required

Approach to Cabane de Susanfe

Stunning scenery along the route
Stage Two: Cabanne de Susanfe to Auberge de Salanfe (via Haute Cime)
Distance: 11.5km / 7.1miles (or 7.5km / 4.7miles without Haute Cime variant)
Elevation gain / loss: 1160m / 1330m (or 460m / 660m without Haute Cime variant)
Stage two ascends further until the Col de Susanfe. The ascent is relatively steep but easily doable with a good trail and clear marking. Depending on the time of year you go, this section may have snow, prepare appropriately. From the Col de Susanfe, turn left to head up the Haute Cime or continue down onto Auberge de Salanfe
Heading down to Auberge de Salanfe, the path is a little tricky to find at first from the Col. Be sure to check your map carefully and ask other hikers if needed. Finally in the trail you will be descending. The descent is mostly straightforward, however there were snow patches when I went in July. These snow patches required a bit of caution. However, in general the path is clear and flat once you reach the plains of the lake.
Walking along the lake, you may encounter many cows along the path. Whilst they will not aim to hurt you, do not provoke them and walk around them off the path if necessary.
Haute Cime
The Haute Cime summit is approximately 700m and 2km one way. The section is steep with more challenging terrain consisting of loose rubble making descents especially more challenging. Pro tip: leave your backpack around the Col de Susanfe. Bring enough and snacks to summit the Haute Cime whilst leaving your heavy backpack at ‘base’. This will significantly ease your ascent. Many people were doing it. Due to the very limited number of people on trail, it is safe to do so (and I did on my journey), but it will be at your own risk.
Typically, winds pick up throughout the day, so the best time to summit is as early as possible. Once reaching the top, you will be treated to breathtaking views stretching to Mont Blanc and beyond. For the brave, there is a spot to pitch your tent at the slight plateau at 3000m before the final ascent with good shelter from the wind. Someone before has made this possible.
Check the weather forecast and your insurance before going, as some insurers only provide insurance up to 3000m, the Haute Cime is at 3200m+!

Leaving Cabane de Susanfe

Lac de Salanfe
Col de Susanfe

Lac de Salanfe from Haute Cime

Ascent of Haute Cime

Steep descent with loose rock

Trail leading to Haute Cime

Haute Cime overlooking Mont Blanc

Tricky trail section after Col de Susanfe

Tricky trail section after Col de Susanfe

Sunset at Auberge de Salanfe
Stage Three: Auberge de Salanfe to Mex
Distance: 8.5km / 5.3miles
Elevation gain / loss: 500m / 1110m
The stage begins with a 250m ascent to Col du Jorat. Once again, the path is pristine and the ascent is less challenging than earlier ascents. Once reaching Col du Jorat, you will be seeing the southern face of the Dents du Midi for the last time. The next stage towards Mex and onwards is much more green with forests and grasslands. The descent is fairly steep and long but not challenging. The rest of the stage to Mex is of easy difficulty. The views are slightly less impressive than previous stages but the change in topography is welcome and pleasant.
In Mex, there are water sources, refuges and restaurants.

Morning at Auberge de Salanfe

Col du Jorat

Descent from Col du Jorat

Descent from Col du Jorat

Walking over a waterfall

Approach to Mex
Stage Four: Mex to Auberge de Chindonne
Distance: 8.1km / 5miles
Elevation gain / loss: 630m / 200m
Stage four is similar to stage three. You will be passing through a mix of forests and grasslands. The water features are notable in this stage, as you pass many waterfalls and impressive streams. The trail is well maintained and the ascents are much less strenuous than in stage one and two. This section also follows the mountain; most of the trail is bound between steep faces to the left and right. The views therefore aren’t as panoramic here but this allows for easy and faster walking.

Tight trails with many streams

Passing waterfalls

Ascent through the forest
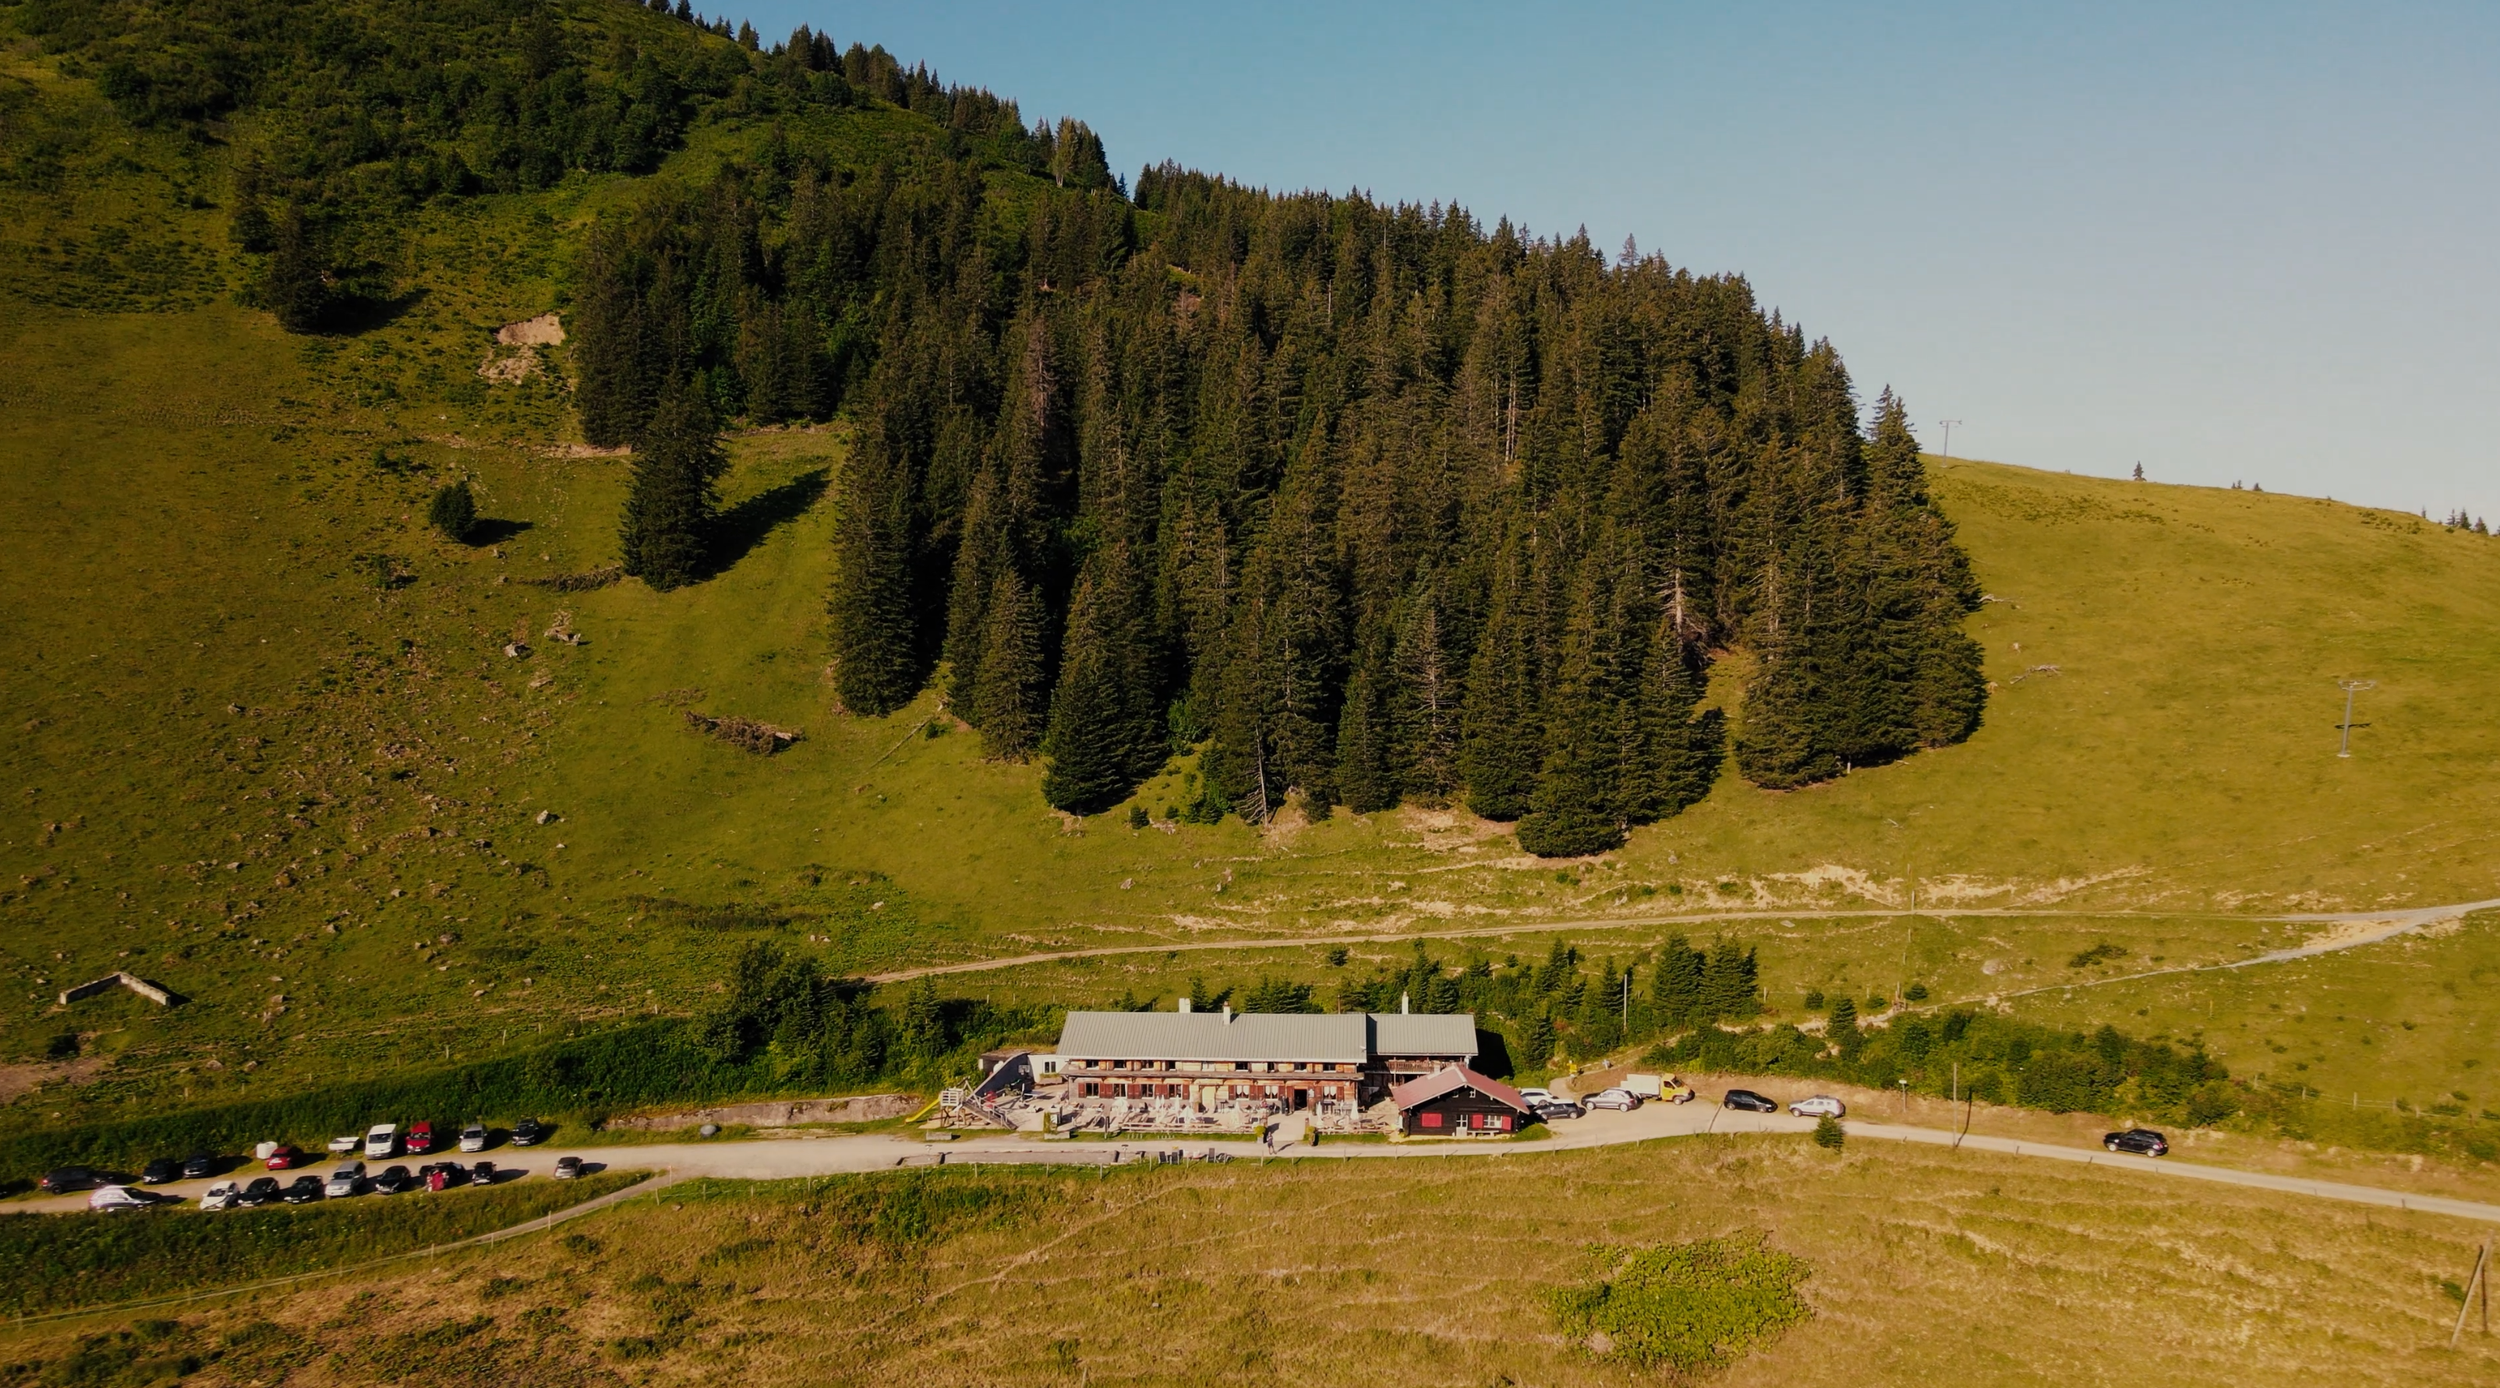
Auberge de Chindonne

View from Auberge de Chindonne
Stage Five: Auberge de Chindonne to Cabane d'Antème
Distance: 11.7km / 7.3miles
Elevation gain / loss: 570m / 230m
Following the forests of stages three and four, the scenery changes again! You will be able to see the Dents du Midi again after two stages of absence. The mountains are spectacular from this section. In addition, towards the north, Lake Geneva is visible in the distance, providing stellar panoramic views. The trail is of high quality and easy to follow.
I highly recommend the detour to Signal de Soi. This will add 20 minutes to your journey but the views make it all worth it. You will see signs for Signal de Soi as you approach, it can not be missed! The Signal is also quite popular with day hikers, so expect the trail to be a little busier here.
Following the Signal, you will descend down to the Cabane d'Antème accompanied by far reaching views along the way.

Leaving Auberge de Chindonne

The initial section largely follows the side of the mountain

Approaching Signal de Soi. Lake Geneva in the distance

Lake Geneva in the distance

Beautiful views of the Dents du Midi

Signal de Soi

Signal de Soi - a worthwhile 15 minute detour

Great trail conditions continue

Directions

Cabane d'Antème lunch
Stage Six: Cabane d'Antème to Champéry
Distance: 6km / 3.7miles
Elevation gain / loss: 50m / 800m
The final stage can be taken in many routes to reach Champéry. After passing the Lacs d'Antème, continue following the trail. I recommend aiming for the Passerelle Belle-Étoile suspension bridge. The bridge can be quite frightening if you have a fear of heights but will make for some epic photos! To reach the bridge you will have to descend down then back up 50m after the bridge before being reunited with the Refuge de Bonavau. From the refuge, you will be re-tracing your steps from stage one down to Champéry.

Lacs d'Antème

Great trail marking along the route

Trail condition along the route

Passerelle Belle-Étoile

Passerelle Belle-Étoile

Back to Champéry, walking past Refuge de Bonavau

Clockwaise or Anticlockwise
The route is typically done anti-clockwise (setting of for Haute Cime and Lac de Salanfe from Champéry). Should you wish to summit Haute Cime, you may decide to go clockwise if the weather on day one is not looking as good as day three for example.
Anti-clockwise
For:
The most popular way, you will be walking alongside more hikers. This may be beneficial for less experienced hikers.
The typical day one via Haute Cime to Auberge de Salanfe sees the greatest elevation gain and is the hardest. You can get this done early and enjoy more gentle days ahead.
Hiking towards the Cabane de Susanfe requires some scrambling and is done much easier going upwards on the anticlockwise route than downwards on the clockwise route.
Against:
Due to the popularity of the anticlockwise route, expect slightly more crowds along the away (although you will be bumping into many day hikers across the trail anyway!)
Clockwise
For:
You may find this route to be less busy especially in the early morning.
Summiting the Haute Cime is best done as early in the day as possible, therefore starting the day at Auberge de Salanfe and heading clockwise will allow you to
Against:
The descent from Cabande de Susanfe requires scrambling and is more challenging than if you were to ascend it.
If hiking anti-clockwise, you are greeted on the final day overlooking Champéry, your finishing spot. You don’t have this if hiking clockwise.
In conclusion, either option is great and will leave you with stunning views. Whilst the anti-clockwise route is more popular, the clockwise route is also very much possible.

Weather
Between June to September, expect the temperature to be between 15 - 22°C. The temperature drops significantly around these months.
May and June are typically the most rainy months, approximately 16-18 rainy days per month. Around these months, there are approximately 10 rainy days per month the rest of the year.
The weather in the Alps can be notoriously unpredictable due to the region's complex topography and diverse microclimates. Rapid changes in elevation and the interaction of air masses from different directions contribute to this variability. As warm, moist air rises over the mountains, it can cool rapidly, leading to sudden cloud formation, rain, or even snow, making it challenging to forecast with precision.
Top tip: Never trust the weather forecast more then 24 hours in advance! The weather changes very rapidly, you must be prepared for all weather conditions during your adventure.
Waterproofs (including boots) are essential as well as sun cream, and a cap to protect you from the sun. In general, you won’t need crampons if hiking during the summer months. Winter conditions can be highly unpredictable and only go during the winter if you’re an experienced hiker.
Weather Forecasts
Getting to Champéry
Plane
The closest airport to Champéry is Geneva Airport. Many major airlines fly to Geneva including British Airways, EasyJet, AirFrance, Delta and more. Check below for your specific location. If possible, consider alternative modes of transport such as bus or train that are less carbon intensive.
Train
It is very simple to reach Champéry by train.
Geneva to Champéry (via Lausanne)
Journey time: 2 hours 20 minutes
Cost: 50CHF (£45 or 53€ or $60)
Transfers: one at Aigle
Car
Driving to Champery is possible. Official parking can be found here:
Cable car parking (5CHF per day, cash required
Food and Water
Typical foods
Rösti - A potato dish similar to hash browns, often served as a side dish or with eggs, cheese, and bacon.
Fondue - made with local cheeses, you’ll dip bread cubes into melted cheese.
Raclette - melted raclette cheese is served over boiled potatoes, pickles, and onions.
Soups - using local vegetables, meat or cheese
Local chesses - Gruyère, Tomme Vaudoise, Emmental and many more…
Chocolate - a trip to Switzerland isn’t complete without swiss alpine chocolate!

Rösti

Fondue

Raclette

Local soups

Gruyère Cheese
Supermarkets
Large supermarkets can be found in Champéry, at the start and end of the trail. Whilst there are no other supermarkets along the trail, this should be plenty given the length of the trail and the opportunity to eat food in refuges along the way.
Refuges and Restaurants
There are numerous huts serving food along the way, see my map above for the full list. The main huts include:
Refuge de Bonavau (card accepted)
La Cabane de Susanfe (card not accepted)
Auberge de Salanfe (card accepted)
Auberge de Chindonne (card accepted)
Cabane d'Antème (card not accepted)
In addition, there are restaurants located in:
Champéry
Mex
This list is more than enough to allow you to comfortably eat along the way without bringing lots of food in your backpack. Caution on the swiss prices, you will be paying between 20-30 Swiss Francs per meal.
Camping
Gas canisters can be bought in the following places:
Geneva:
Decathlon - Rue de la Confédération 6, 1204 Genève, Switzerland
Ochsner - Rue du Marché 9/11, 1204 Geneva, Switzerland
Water
You will rarely be far from a water source along the tour. Refuges and restaurants will offer water. My favourite source of water however is by filtering glacial water from streams passing the trail. There are probably hundreds of these glacial streams serving you cold and fresh water. Do filter the water as livestock does roam the alpine environment and may leave traces of harmful bacteria.
By filtering water, you can afford to bring less water with you. This can save you weight but be sure to know how much water you have at all times and when the nearest water source is.


Accomodation
Accomodation consists of refuges and camping (where available). See my list below for more information.
-
Campsites
Two designated campsites allow you to spend the night for a considerable cost saving in comparison to refuges.
Camping du Grand Paradis (Champery)
The ideal starting and finishing base, the campsite has space for tents of all sizes, showers, washing room and electricity (at an additional cost).
Ask the staff of the auberge and they will direct you to their designated camping spot. There are many cows around the auberge, so do not camp outside their camping zone as the zone is protected with electric wires.
The campsite offers stunning views overlooking the lake and mountains. You can use the showers and toilet facilities of the auberge as well.
There are no campsites on the northern section of the walk after leaving the Auberge de Salanfe. Take this into account when planning your trip. You will be mainly walking along the mountain with steep slopes to your left and right, making finding a campspot not so easy in emergencies!
-
You are not allowed to camp in the wild as the trail passes through protected natural areas and private lands.
Bivouacking
Setting up a simple tent above 2,000m altitude and away from villages and huts is generally tolerated.
Make sure not to leave any trace following the overnight stay and be gone in the morning.
-
Refuges are located nicely to allow you to complete your walk with no concern of finding accomodation. These refuges include:
Booking advance might be needed, recommended checking.
(small, book in advance)
(busy, book in advance recommended)
(large, booking in advance often not needed)

Walking past Refuge de Bonavau

Enjoying the views at Cabane de Susanfe

Morning at Auberge de Salanfe

Auberge de Chindonne
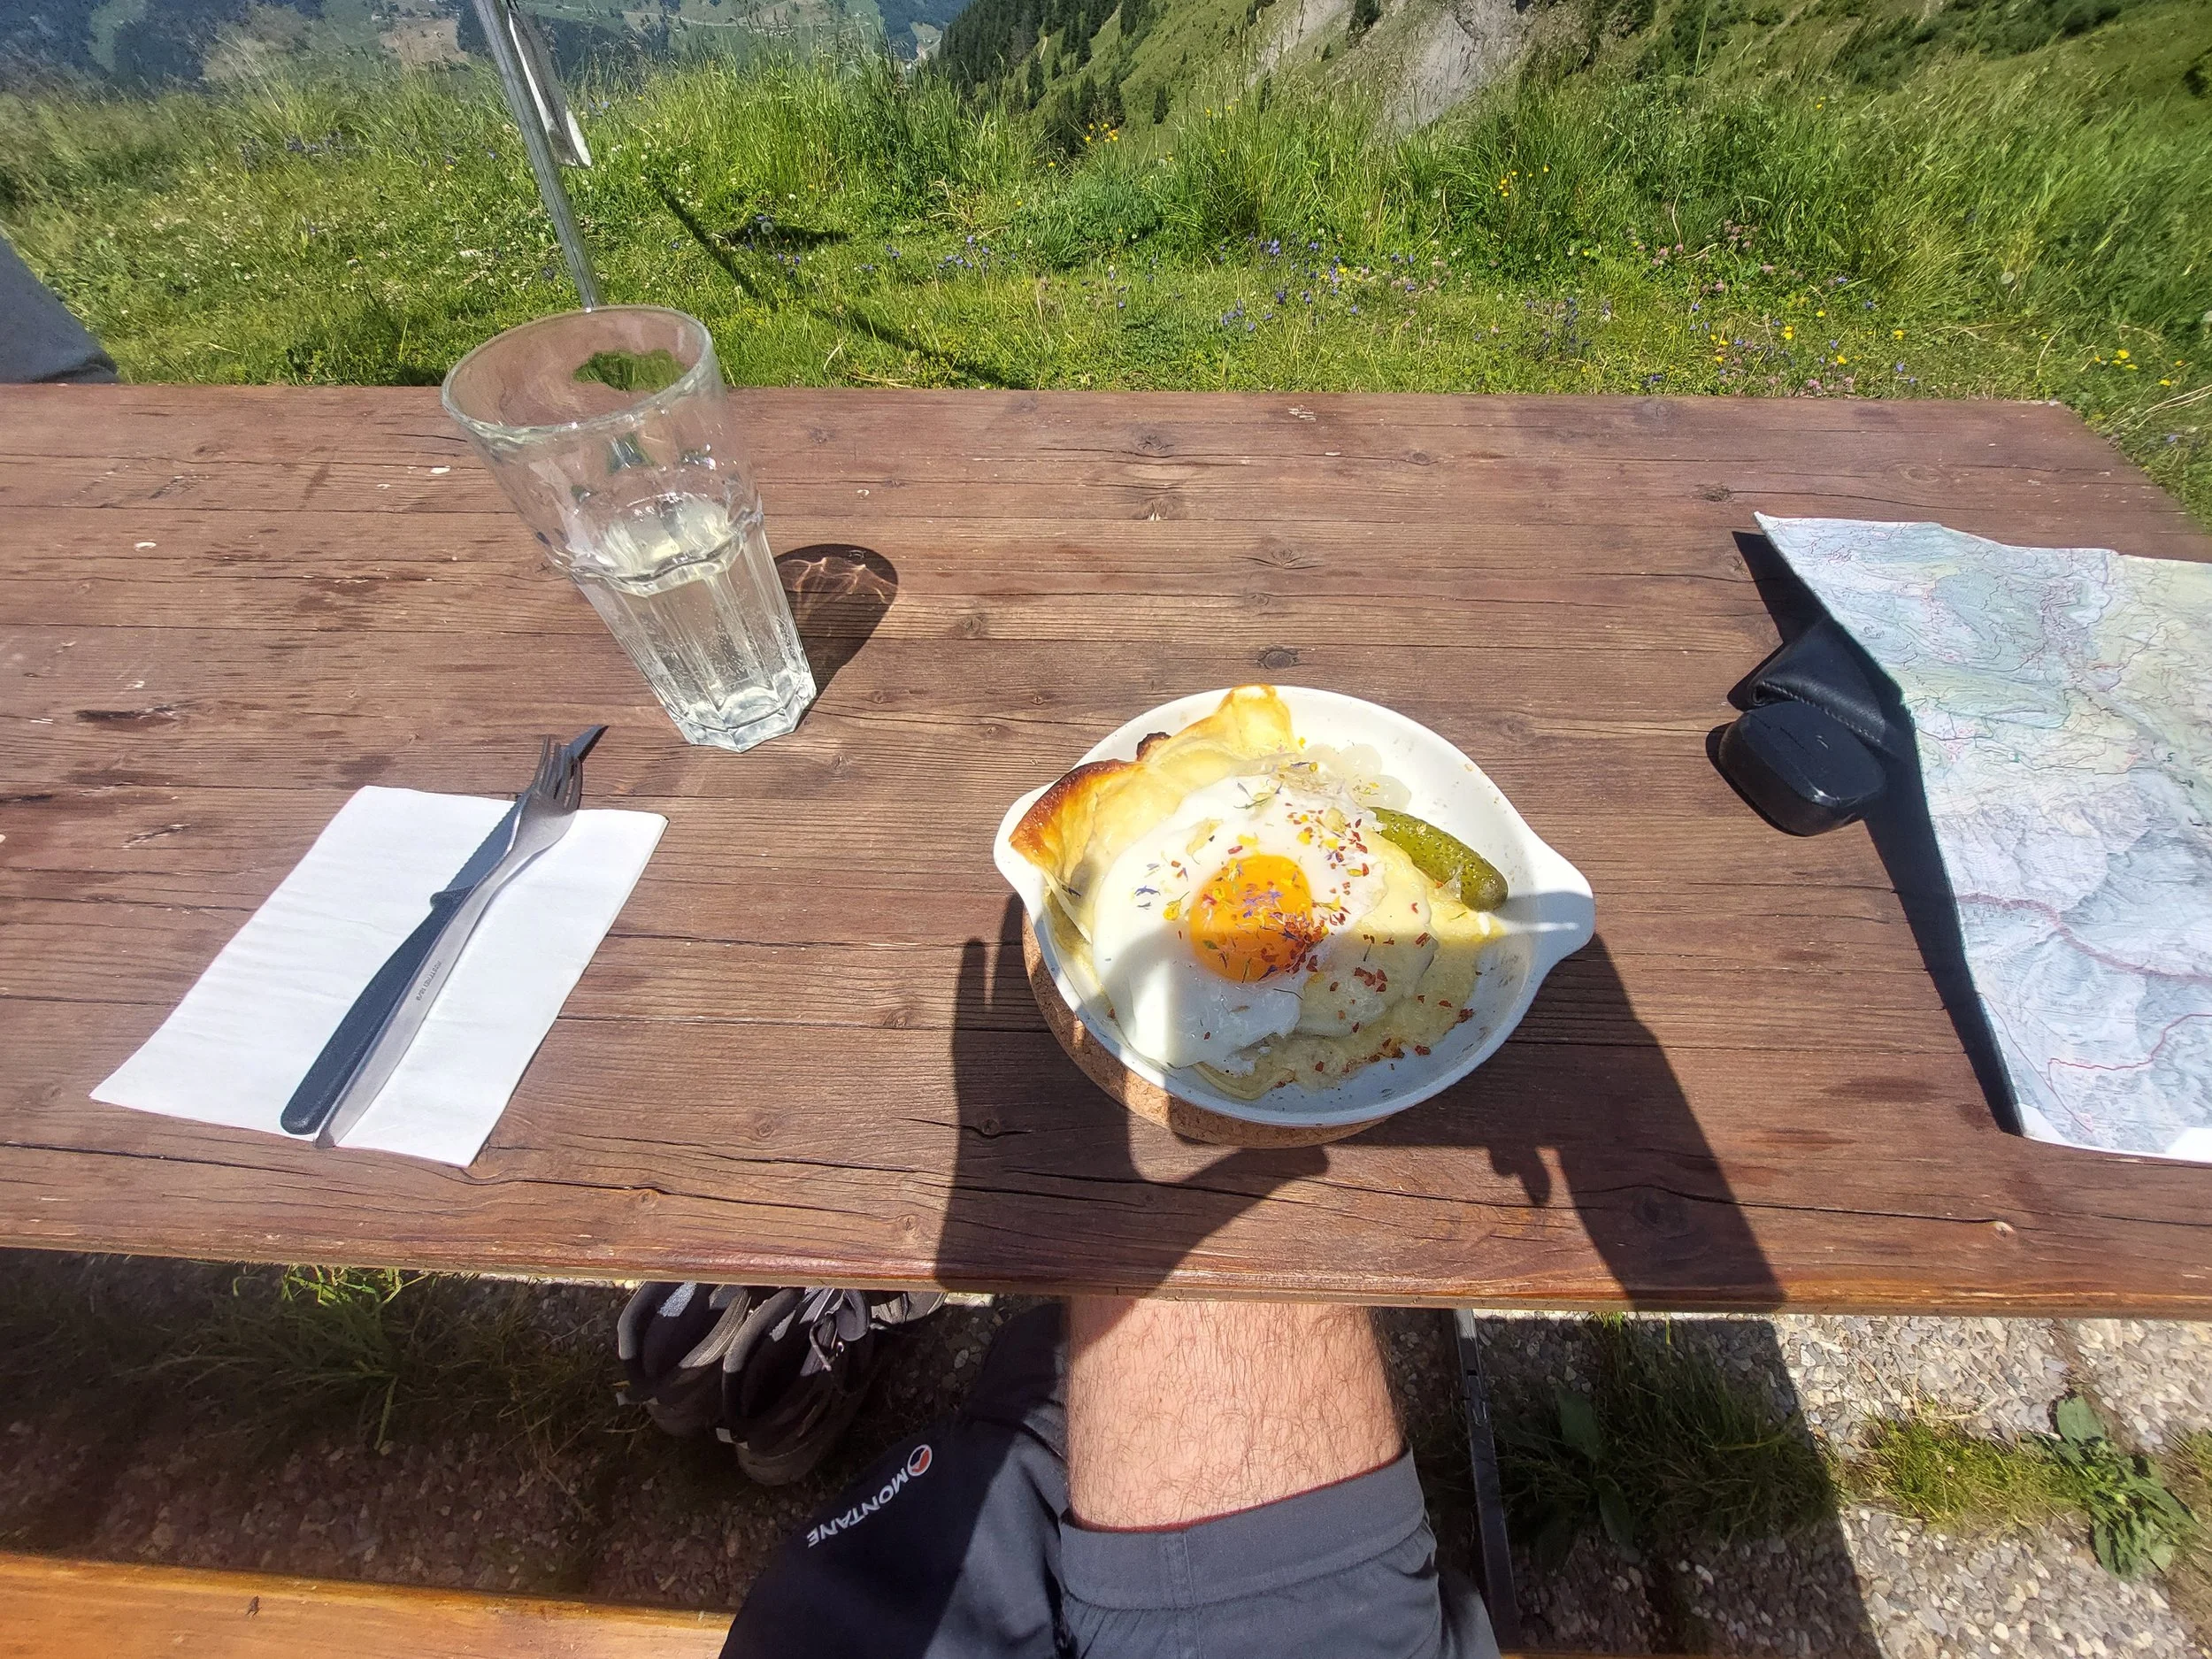
Lunch at Cabane d'Antème
Packing Advice
Deciding what to pack will vary on the type of hike you are doing. Naturally, day hikes will required significantly less packing than a through hike with a sleep system. Below is advice on what to pack for day hikes or thru hikes.
Footwear - the most important item you should invest in. Bring a good, quality worn in pair of hiking boots / trail runners. This will prevent blisters, general pain in your legs and will keep your feet warmer and dryer.
Waterproofs - check the weather before each day of hiking. Weather conditions can change rapidly in the Alps and you should be prepared for all conditions.
Lightweight mindset - there are a lot of ascents in the trail. Keep in mind what you don’t need and can leave at home, you will be grateful during the hike!
Download my suggested packing list for the Tour. Customise it as you wish, this is just a guide!

Maps and Waymarking
Maps come in two forms: digital or printed. Personally, I like the feel of a printed map as well as knowing its battery won’t die on you. Digital maps have advantages including often a GPS tracker, live weather forecasts and general ease of use and small size compared to a map. However, phones are dependent on battery life, sometimes internet signal and the performance of your phone can vary on a cold night or with heavy rain it may be difficult to use the touchscreen.
Maps require more planning. I like to draw the route out with a sharpie. Maps are often bulkier and the often cost between £10 - £20 each. However, self-navigating can be a rewarding and fun process on the trail. Don’t forget a compass too whe using a printed map.
Online Maps:
Few trails show the correct trail as you will see from the waymarkers on trail and throug printed maps. Often, the section from Mex to Cabane d'Antème via Auberge de Chindonne is incorrect! Many online maps will take you much further down elevation than the real trail goes resulting in unecessary climbing and descending.
Take this into account when using online maps. You can still easily follow the trails online whilst keeping an eye out for the markers on the trail. Refer to my map above as well for the correct version!
Printed Maps:
Chablais Valaisan - 1:25,000
I used this map with success. The map is very detailed showing routes, refuges and more very clearly. I would highly recommend purchasing this map.
Waymarking
The route is very clearly marked along its entirety. This is a common practice in Switzerland, and the Tour des Dents du Midi does not dissapoint. Directions can be seen below shown with waymarking posts and clearly visible stripes painted on trees or rocks.
The trail is extremely well maintained, nothing more to say!

Waymarking post

Marking of the tour

Very well maintained trails
Languages
French is the spoken language along the Tour, although both English or German is spoken readily as well. Even with my limited French, I managed to get by very well. Below are some useful phrases to help you along with French.
English - French
Hello - Bonjour
Goodbye - Au revoir
What’s your name? - Comment t'appelles-tu?
North East South West - Nord Est Sud Ouest
Mountain - Montagne
Footpath - Sentier
Refuge - Refuge
Do you speak English - Parles-vous anglais?
Food - Nourriture
Toilet - Toilettes
Water - Eau
Beer - Bière
Cheese - Fromage
Can I pay please? - Je voudrais payer, s'il vous plaît.
Cash or Card
Answer: Cash (but can get by well with card)
Currency: Swiss Francs (although Euros sometimes accepted)
Card payment can be done in supermarkets as well as the following:
Restaurants and other hotels in Champéry or Mex
Cash is required at the following:
Camping du Grand Paradis (will take euros as well)
ATMs are available in Champéry.
Phone and Internet
Wifi
Wifi can be found in Champéry and the Auberge de Chindonne. Wifi was not available at the Auberge de Salanfe, although mobile data was present here in selected areas (by the swings and church for example!). If you need a solid internet connection throughout the hike, mobile data is your best option.
Mobile data
Check your phone provider for more information. As Switzerland is not part of the European Union, it is likely (if you are coming from the UK or EU) that your network provider will not cover the Swiss region. By searching e.g ‘Vodafone Coverage Map’, you will be able to find out with regards to your provider.
Phone signal is very good throughout the hike with 4G and 5G available in most areas. That is not to say all! In general however, I had no problems regarding phone signal being absent for extended periods of time. From Champéry to Lac de Salanfe, I found my phone connecting to French networks meaning I didn’t have access to my Swiss internet plan!
Swiss network provider:
Swisscom (1 week tourist plan) - shops at Geneva central train station, Monthey, Martigny etc.
Sunrise - tourist plan available - shops in Geneve, Monthey etc.
Charging
EU plugs / adapters are not guaranteed to work. I would recommend buying a swiss adapter from a supermarket or similar store before starting the hike.
Swiss plugs are ‘three-pronged’ compared to the EU’s ‘two-prong’ system.

Key Contacts and Emergencies
Dial 112 for ALL general emergencies.
Mountain rescue: 144
Make sure you have adequate insurance cover. Many insurers specify the maximum elevation they will cover you to. Make sure you are ensured to all elevations on your hike. The maximum elevation of the Tour des Dents du Midi is approximately 3100m with the Haute Cime variant. It is advisable to leave a copy of your insurance with a member of family or friend, and take the original with you. EU citizens are eligible to reduced cost (sometimes free) urgent medical treatment through the European Union Health Insurance Card (EHIC) in Switzerland. However, payment may be required at the time of treatment, so be adequately insured.
Further References
There are some great ways to get further information regarding the hike! These three resources are where I find out most about any hike, not just the Tour des Dents du Midi.

-
One of my most underrated souces of information, there is a facebook group for any hike out there. In the case of the Dents du Midi, there are several groups that may provide useful tips including Swiss hiking groups, long distance hiking groups and more.
Ask any question, read other questions, other posts, a faebook group is just a trasure trove of informtion. I can guarantee any question will get answered.
In addition, checking groups on the day of hiking can give important updates on the trail condition or anything ese to be aware of.
-
To get a real sense of the feeling of a trail, there is no better site. YouTube offers a unique insight where words on a page simply are not enough. When watching a video, try and look out for things like busyness on trail, the path condition at the time of year and small details like sources of water, streams etc.
Most youtubers (below 10,000) subscribers will answer questions you may well have as well, I certainly do!
Finally, plug for my own video… I hope my video conveys what it's like to complete this hike!
-
A guide to the trail using topographic maps can be found here:
The guide costs 10€ and contains useful information on the stages of each tour, accomodation and more.
You will be able to learn abut the local area’s deep history as well as the geology of the area through this guide.

YouTube is a great source of information, not just my video! ; )